Best wishes to all for a Happy New Year!
May this year bring you love, peace, joy, and fine health.

Friday, December 31, 2010
Gesso Board Warping Followup
Craig Daniel of RealGesso quickly responded to my email and asked that we discuss the matter by phone. We talked this afternoon on the pluses and minuses of back sizing and gessoing. His board backs are neither sized nor gessoed. He mentioned that a sizing only application presents a sticky surface and that gessoing over that often leads to a twisting kind of warping, one that he described as "like a Pringle". Basically, that reverse side application is not a cure all.
Craig offered to send me a cradle to pull my panel back flush. I explained that I am only now exploring and testing--a kind offer, but not needed at this time. He mentioned that some artists work with the board cupping during mounting. Others will work only with his cradled panels. Some don't like the added depth that cradling brings. As he explained, there are different requirements for each artist.
So, where does this leave me? The warping I presented yesterday is, for me, unacceptable. I would really need to use a cradled board, or perhaps a well sized and gessoed back side. Craig's gesso work is really fantastic. He discussed how he's worked for years perfecting his recipe. It sure works for me. True Gesso offers panels gessoed on both sides so perhaps I'll give them a try. I want to check in with Natural Pigments as their boards have some back side gessoing and are quite flat although I had real trouble with their pinholes. Lastly, I could begin making my own. I plan to gain a bit of experience with that as I size and gesso the back side of some of these RealGesso boards.
What would happen with larger panels, say anything over 9x12"? Would every board without cradling warp, at least to some extent? In time, I will better know what works for me.
I poked through my library this afternoon and offer the results below. There seems to be a consensus for reverse side coating but mention of panel size is not clear. How small is "small" and how large is "large"? :-)
Luminous Brush by Altoon Sultan p. 38
"If you use large, uncradled panels, they need to be sized on both sides to prevent warping, then left to dry against a wall. Let the sized panels dry overnight."
Egg Tempera Painting by Koo Schadler
Recommends size and gesso on both sides as well as coating the edges.
The Painter's Handbook by Mark David Gottsegen
Recommends size and gesso on both sides.
New Techniques in Egg Tempera by Robert Vickney p. 40
"Step 6. Turn the panel over and repeat the process. The panel must be sized and gessoed on both sides to prevent warping."
The Artist's Handbook Version 5 by Ralph Mayer p. 315
"If gesso is applied in equal coats to both the front and back of a small Masonite panel there will be little chance of the panel's warping or twisting because of unequal tension. Some painters have prepared panels in this way, especially in the smaller sizes, and left them unbacked by wooden frames, sometimes protecting the edges with thin chromium or copper channel strips."
The Practice of Tempera Painting by Daniel V. Thompson Jr.
I could find no mention of reverse side conditioning.
Thursday, December 30, 2010
Gesso Board Warping
How is it that just recently I noticed warping in my gesso boards? It seems that all my RealGesso boards are warped, to some extent right out of the wrapping. The Natural Pigments boards exhibit little to none.
This board is the furthest out of whack, perhaps because it received a few fully covered layers?

The Natural Pigment boards have some gesso on the backside, and I suspect they are also sized. The RealGesso boards have no gesso on the back. They might be sized; I'm not sure.
I've read in many places that warping is common without back coatings, especially as board size increases. Sometimes bracing is used. I have rabbit skin glue and gesso mix so I could probably try working these boards up myself. I have contacted the manufacturer for guidance. More on this later...
Wednesday, December 29, 2010
Complementaries For Shadowing
This evening I kicked up the chroma with a couple more layers of red. Next came many layers of Viridian that simply did not give intended results--this pigment doesn't have much covering power. Switching over to Phthalo Green Blue Shade aggressively pulled the red into neutral tones. I don't know that I'd always want to shadow so heavily but I have learned an effective technique.
Now I need to spend some time composing a final image, getting the lighting just so.

Now I need to spend some time composing a final image, getting the lighting just so.

Tuesday, December 28, 2010
Back To Work
As an experiment in pushing the value range, the shadows were overlaid with transparent red, the highlights with opaque white. Next I'd like to try blue green over the red and yellow green over the white. The scan's a bit strained. I've been having trouble with this panel. Wondering if it has anything to do with those first full coverage layers...
I've been away from the brush while enjoying a most wonderful Christmas, but it does feel good to be back. Perhaps a little break once in a while is a good thing. :-)

I've been away from the brush while enjoying a most wonderful Christmas, but it does feel good to be back. Perhaps a little break once in a while is a good thing. :-)

Monday, December 27, 2010
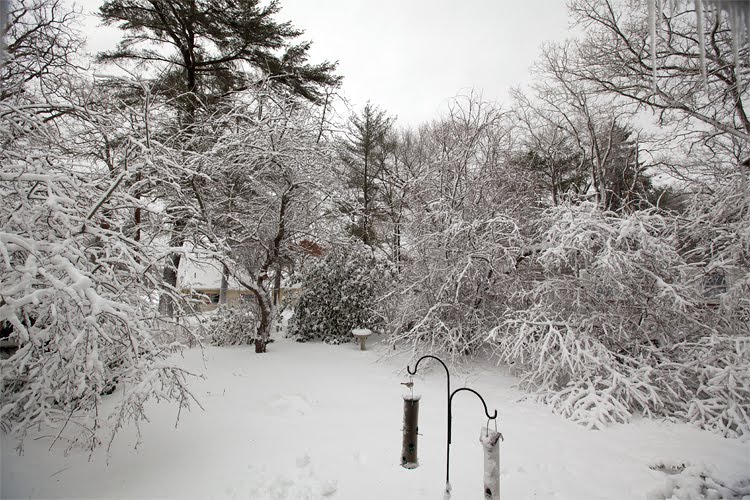
It's Over!
It's one in the afternoon and the major snow has fallen. There's still to be snow showers but hopefully not much more to shovel. I'm sore! :-) A few shots from around the yard...


Sunday, December 26, 2010
First Big Storm of the Season
It's 1 PM and snow is falling lightly.


It's 5 PM. The wind is picking up.

10 PM. Strong winds and little snow. A six second exposure shows lots of branches dancing in the wind.


It's 5 PM. The wind is picking up.

10 PM. Strong winds and little snow. A six second exposure shows lots of branches dancing in the wind.

Saturday, December 25, 2010
Herbs, One Week Later
My little herb starter from a week ago is still doing well. I keep them mostly covered with plastic wrap and they seem to like that. And, it sure makes it easier for their absent minded tender to keep them moist. :-)
The sage looked rather ragged for a few days but then perked up nicely. I may need to look to potting soon.

A storm is on the way. Until moments ago, there were no snowfall predictions. The "official" forecast is now something like a foot, but here in New England anything is possible, and likely.
The sage looked rather ragged for a few days but then perked up nicely. I may need to look to potting soon.

A storm is on the way. Until moments ago, there were no snowfall predictions. The "official" forecast is now something like a foot, but here in New England anything is possible, and likely.
Merry Christmas!
Friday, December 24, 2010
Merry Christmas!
Just a bit of work this evening... total white overlays and some yellow washes.


Merry Christmas!
Thursday, December 23, 2010
Further Layering
After last night's scan I washed a bit of ultramarine blue into the leaf overlaps. The darkening was considerable and later layers of oxide of chromium pulled the green back. This evening I remembered the new Viridian pigment, a darkish blue-green that worked so nicely. It's a transparent and powerful pigment, somewhat akin to the phthalos. After shading on side of leaves, titanium white with a bit of green made for highlights on the opposing leaf sides.
I think that in general this piece is sliding off to the cool side. Tomorrow I'd like to try warming up the highlighted side with some yellow layers, as well as some white washed to pull the colors closer as well as smoothing things out.

I think that in general this piece is sliding off to the cool side. Tomorrow I'd like to try warming up the highlighted side with some yellow layers, as well as some white washed to pull the colors closer as well as smoothing things out.

Wednesday, December 22, 2010
First Color
The first layers of color are coming in slowly. Greens with Oxide of Chromium and Nicosia Green. Luberon Red Ochre for the stems. Various amounts of Titanium White. The Nicosia has a slight blue bend that's useful for shadowing.
Before starting on the herb, five layers of Titanium White in a light wash were applied across the entire panel. Earlier panels with lots of open ground have a chalky uneven appearance. Establishing a base is giving this painting a nice smooth look.

Five hours flew by with this evening's work.
Before starting on the herb, five layers of Titanium White in a light wash were applied across the entire panel. Earlier panels with lots of open ground have a chalky uneven appearance. Establishing a base is giving this painting a nice smooth look.

Five hours flew by with this evening's work.
Tuesday, December 21, 2010
More Silverpoint Work
This is pretty much a wrap for the silverpoint. There are hours of work here, not only for building up value but also for adding detail that didn't come across with the transfer. Silverpoint is a rather intriguing medium, sort of like a single tone graphite pencil that allows for a slow building of value with a point that never wears out.
Tomorrow will bring some color! :-)

Happy Solstice! Brighter days ahead! :-)
Tomorrow will bring some color! :-)
Happy Solstice! Brighter days ahead! :-)
Monday, December 20, 2010
Transfer to Gesso
From The Practice of Tempera Painting:
"The outlines and modeling are to be worked up on the white gesso surface in ink. The shadows may be done exactly as on tinted paper, with a thin wash of ink on an almost dry brush, gradually strengthening the tone by the addition of more ink, and producing a smoothly modeled shadow. Or they can be wrought more boldly, with hatching strokes like a pen drawing, or any other way the painter pleases. This ink drawing on the gesso acts as an underpainting, and has a profound effect on the modeling of the shadows on the actual painting with colors. It should be carried out with about as much accuracy and finish as the painter wishes to bestow upon the final painting. Color may be used instead of ink, if you prefer. The drawing may be done with tempered pigment, black or any color, as long as the half tone and shadow values are established at least as strongly as they are to be painted."
Here's the transfer onto gesso with Saral. (Not one of my better scans but the tone is still light.) I'm working the lines over with silverpoint and then going after shadows. Now just how does one create a range of values with a little piece of fine silver? I soon found that quick and jumpy spasms make a scratchy mess. Smooth graceful lines followed by small and lightly applied circular strokes are effective. Hatching and crosshatching make for a convincing and controllable value range.
I don't expect to take the metalpoint very far, just enough to guide me with the color, but wouldn't a well done silverpoint be a fine long term project...

Thompson, Daniel V. Jr. The Practice of Tempera Painting. New York. Dover Publications. 1962. (Yale University Press. 1936.) p. 49.
"The outlines and modeling are to be worked up on the white gesso surface in ink. The shadows may be done exactly as on tinted paper, with a thin wash of ink on an almost dry brush, gradually strengthening the tone by the addition of more ink, and producing a smoothly modeled shadow. Or they can be wrought more boldly, with hatching strokes like a pen drawing, or any other way the painter pleases. This ink drawing on the gesso acts as an underpainting, and has a profound effect on the modeling of the shadows on the actual painting with colors. It should be carried out with about as much accuracy and finish as the painter wishes to bestow upon the final painting. Color may be used instead of ink, if you prefer. The drawing may be done with tempered pigment, black or any color, as long as the half tone and shadow values are established at least as strongly as they are to be painted."
Here's the transfer onto gesso with Saral. (Not one of my better scans but the tone is still light.) I'm working the lines over with silverpoint and then going after shadows. Now just how does one create a range of values with a little piece of fine silver? I soon found that quick and jumpy spasms make a scratchy mess. Smooth graceful lines followed by small and lightly applied circular strokes are effective. Hatching and crosshatching make for a convincing and controllable value range.
I don't expect to take the metalpoint very far, just enough to guide me with the color, but wouldn't a well done silverpoint be a fine long term project...
Thompson, Daniel V. Jr. The Practice of Tempera Painting. New York. Dover Publications. 1962. (Yale University Press. 1936.) p. 49.
Sunday, December 19, 2010
A Rosemary Starter
It feels like the time to get back to the rosemary art work. Here's the transfer built from an image off the laptop lcd screen. I planned to make the transfer to a gesso board but I managed to ruin a board. That scraper seems to catch and gouge; it probably needs dressing prior to use by slightly rounding the corners and creating a burred edge. I grabbed a new board and smoothed it nicely with 600 grit and degreased it with denatured alcohol. I'm looking forward to cracking an egg! :-)

Saturday, December 18, 2010
More Herbs!
More herbs held prisoner at the local supermarket were rescued this afternoon. They are resting comfortably after having their stems trimmed and set in water.

There are many web references to rooting rosemary and thyme, not so many for sage. Here's hoping for roots soon!

There's been little to post on rosemary work but hours go by simply examining details and making little sketches. Discovering the fractal nature of opposing leaves is satisfying. Attempts to grasp perspective send me back to the basics with pencil exercises.
Friday, December 17, 2010
More Books!
I am a confirmed book junkie. Here are a couple more that arrived today. Koo Schadler has an egg tempera class coming up in June that interests me so I'd like to get up to speed as much as can. Besides, I'm like a sponge with art books. (The Speed book links to Google books.)


Thursday, December 16, 2010
Kremer Rocks!
I placed my third Kremer Pigments order Tuesday at 11PM and it arrived today, fast and complete. Cerulean Blue, Prussian Blue, Yellow Ochre, and Burnt Sienna in the back row. Phthalo Green YS, Viridian, and Venetian Red in the front. Those are my rosemary sprays peeking in.
Pigments are addictive! :-)

I woke up this morning thinking about sketching the rosemary and yet knowing that it would be twelve hours before I could get to it. Well, I got that right and then some. It's been a long and crazy work day that sucked the energy out of me. No matter, I'll now get in a bit of pencil! :-)
Wednesday, December 15, 2010
Rosemary Needle Color Study
Based on last night's color charts, I explored Chromium Oxide for the rosemary needles. Working clockwise, I first tried to form needles by shadowing with red. Next, the red was mixed with green for a brown. Lastly, a less aggressive mix for a subdued and darkened green. No conclusions at this time. For now, it's simply try and observe. Perhaps all techniques will have a place.
Stem coloring is a whole other trip. There are lots of colors as well as a slightly pubescent coating.
Also on the agenda is studies on needle shape and placement.
I like the relaxed nature of these exercises. I'm taking the opportunity to work in a component-based fashion, confident that all the pieces can come together. Very fun stuff! :-)

Tuesday, December 14, 2010
Color Chart - Greens and Blues
Having never taken the time to lay out any proper egg tempera color charts, I figured it was time to get a bit organized. This scan really doesn't do justice but it does give some idea of the colors and values. From left to right is transparent to increasing opaqueness, mixed with titanium white.
The fourth one down, Rublev's Chromium Oxide Green is a reasonable start for a leafy green. Of course, there's plenty of opportunity to glaze with or over blues or greens for tuning in the right color. Kremer offers a Phthalo Green Yellow Shade that will, along with some other very beautiful pigments, soon be in my assortment.

This chart was painted on Strathmore Bristol Plate, a fine surface for these charts.
Monday, December 13, 2010
Rosemary, A Possibility
I'm exploring possibilities for container plants. I picked up a few small rosemary sprays after work and will try rooting them. I once had a lovely bush but alas one year I forget to take it in for the winter. As long as I had it, I never realized the curly nature of the leaves.


Sunday, December 12, 2010
Asian Pear Wrap
I've taken a bit of license with the coloring as I got all involved with gradation. The pear was covered with tiny spots which I tried to portray with stippling and I bet a toothbrush could have achieved results too.
Light, easy-going layers work very well and little slip-ups are easily remedied but it is very hard to restrain the urge to go over still wet surfaces. Of course, this only leads to damage. I had to do some serious scraping and rebuilding in the green area.
I tried various washes in an effort to find reasonable shadows. I'll be doing some tests and explorations to find something closer to a neutral shadow area.

After stating my goal for showing work, I've been thinking it useful to come up with a bit of a plan. A first question immediately came up: What subjects should I focus on? And now, I already have a start!
NESBA has a booth at the annual Boston Flower Show in March. Joyce (our NESBA president) just emailed to let me know that this year's subject is anything that can be grown in a container. Thanks, Joyce! :-) So it's time to get to thinking and painting, having something ready in time for the show.
Saturday, December 11, 2010
Looking Ahead
My third year of blogging begins today. Although my resolutions have a way of slipping to the wayside, I'll go out on a limb with just one. I'd like to produce work for show.
A local gallery will open for the season in May. NESBA seems to have exhibitions quarterly. I think this means that I explore subjects with various studies for color and composition while I work on technique. I'm looking forward to the fun of learning and the opportunities to meet local artists.
A heartfelt thank you to all my friends here. I get so very much support via comments, emails, phone calls, and in person discussions. I am so touched by your kindness.
Friday, December 10, 2010
Asian Pear
Until recently my tempered mixes were drying out all so quickly. Even with the porcelain palette with wells the mixes still dried quickly. Since I began adding lots of water my problem is over. I find it important to constantly swirl up the mix but that's no issue at all.
As a plus, these watery mixes allow for many glazes, each contributing slightly. I'm finding it much easier to build transitions. I did overdue the shading with umber before realizing that Chromium Green washed worked nicely as a complementary shade. This piece is proving to be a really great lesson.

As a plus, these watery mixes allow for many glazes, each contributing slightly. I'm finding it much easier to build transitions. I did overdue the shading with umber before realizing that Chromium Green washed worked nicely as a complementary shade. This piece is proving to be a really great lesson.

Thursday, December 9, 2010
Pineapples and a Bad Egg
I added a bit of highlighting for a wrap. As a practice piece I gained experience with heavy white mixes. There was a slight warming after washing the leaves with Chromium Green.

For more technique experience, I tried a second cut. As an experiment, a base was established with some transparent blue layers. Next red and yellow was washed over as I tried to pull purple and green out. It began to work but after some lifting, I let it rest.

As I saw some promise of colors, more and more blue washes were applied even though my egg was smelling quite awful. (I'd forgotten to store it in the fridge after use.)

This evening a new batch of temper was whipped up and I began to apply a yellow wash. The blue started lifting right down to the gesso. This is not unusual if I've laid down many layers over a short time and my brush strokes are heavy, but this piece had a day to dry out. I think the bad egg is the culprit here so this piece will be abandoned and I have learned my lesson well! :-)
Wednesday, December 8, 2010
Scraping
From The Practice of Tempera Painting:
"Before beginning to scrape the gesso, powder some charcoal, and sprinkle it over the gessoed surface. Wipe it off with a cloth, and the gesso will be colored gray by it. Where you scrape gesso away, it will show white, and by this simple means you can tell what parts need more scraping as you work.
"Take the scraper in both hands, with the burred edge toward you, your thumbs planted firmly in the middle of that side, and the ground edge away from you. Hold the blade vertically, and draw it toward you. If the edge has a good burr, it will scrape a rectangular shape of white in the gray ground. Do not try to take off too much at each stroke. Low spots in the gesso will show as gray surrounded by white, and you must work them down gradually. The way to do this is to work around them with a crisscross, herringbone motion. Do not work over one place too long, but move on and come back to it."
Here's a board where I tried scraping. I picked up the scraper from Natural Pigments some time ago and figured I'd try it in place of sandpaper. I did manage to smooth out the surface considerably but I still felt the need for some 600 grit sanding. I didn't do the charcoal thing as this was simply a little test. If I do this properly, there's supposed to be no need for sanding.

More boards are on the way from Realgesso.com--another half dozen 9x12" and a couple of 11x14".
Thompson, Daniel V. Jr. The Practice of Tempera Painting. New York. Dover Publications. 1962. (Yale University Press. 1936.) pp. 30-1.
Tuesday, December 7, 2010
More Pineapple Fun
Since the previous post, I've spent about four hours glazing in dark shadows and smoothing out with semi-opaque mixes. I'm having so much fun that I think I'll do all again. It's surprisingly difficult to stick with many light washes and allow for proper drying time between coats. I've dug holes and troughs and had to puddle in fillings. It's good practice with repairs but of course it's best not to dig oneself into a hole to begin with!


Monday, December 6, 2010
Pineapple
Here's an egg tempera version of a watercolor pineapple from some time ago. I wanted something small and loose for practicing blends and light washes. Also, this is a good time to explore some of my new pigments. Opaque white is proving interesting to apply. It doesn't cover totally but softens nicely. I'm using an aqueous dispersion of Titanium White and have read that mixing egg yolk straight with dry pigment will provide more covering power. More on that soon.


Sunday, December 5, 2010
Carlson's Guide to Landscape Painting
I'm spending a good deal of time with Carlson's Guide to Landscape Painting by John F. Carlson. It's probably one of the most eye-opening and thought-provoking books in my library.
From Chapter 9. Trees:
"Know your trees, their nature, their growth, their movement; understand that they are conscious, living things, with tribulations and desires not wholly disassociated from your own. Emerson has beautifully named trees, "rooted men." In many ways they excel man."

"Every tree is a "personality," and possesses, within the limits of its species, a tremendous latitude of expression. Its branches do not, could not, and should not, stick into its sides in a brittle way, as though a hole had previously been bored to let them in. A tree is a highly organized entity, which, when functioning within its realm, becomes beautiful."

Saturday, December 4, 2010
Close Enough For a A Rest
There's a bit left to balance out with some blues and blacks on the wing but mostly this is a wrap. I'll let it rest for a week or so before going back in as I've had a bit a trouble with lifting. My sharply pointed brushes can lead to digging in if I'm not paying close attention so letting the layers firm up somewhat will help me out there.
I learned a lot with this piece, particularly in dealing with feathers and white in general.

I learned a lot with this piece, particularly in dealing with feathers and white in general.

Friday, December 3, 2010
Closing In
This evening I focused from the bottom up with branch, feet, and tail. I'm hoping to wrap this up over the weekend while I ponder the next painting. Some work around the wing and eye, and then some general finishing all over should do it.

On another note, since painting a sky I find myself looking up a good deal. I guess it's only natural that that would lead to clouds. Low gray smoky stratus yesterday. Today pillows of cumulus, some with gray bottoms.

On another note, since painting a sky I find myself looking up a good deal. I guess it's only natural that that would lead to clouds. Low gray smoky stratus yesterday. Today pillows of cumulus, some with gray bottoms.
Thursday, December 2, 2010
A Bit More
Thank you, all you wonderful people, who've coached me on with this piece. You were right; there have been no bird attacks. ;-)
I scraped out the heavy blue on the wing, same for the tail. Dropped in a bit of gray and black for the breast feathering. Straightened the tail and blocked it in.
I'm reading about blocking in first--those big shapes and colors and tones. Details come later. Well, it's a thought any way, and I'd like to try that with the next painting, and also try to remember to apply many light coats.

Wednesday, December 1, 2010
Blues
I'm trying out one of my new blues, Phthalo Blue PB15 Primary Blue. It needs a wetting agent so a bit of isopropyl alcohol does the trick. Mixed with a little white and diluted down with water, it brings me close to the color I need for those spots on the far left. Also trying the Dioxizine Violet for the shoulder.
I'm not too sure where this bird is going. I feel like my color is out of control so I've done some scraping. I may let it rest for a bit while I turn to something else. It does look okay from a distance; it's when I get up close that I wonder when leaving the house that I might be attacked by a real jay for misrepresentation. :-)

I'm not too sure where this bird is going. I feel like my color is out of control so I've done some scraping. I may let it rest for a bit while I turn to something else. It does look okay from a distance; it's when I get up close that I wonder when leaving the house that I might be attacked by a real jay for misrepresentation. :-)

Tuesday, November 30, 2010
Kremer Pigments
My Kremer Pigments order is in. This company pleases me to no end. Orders come in quickly and complete. So, I have found a home with Kremer.
Here is a nice range of bright colors. Tonight I'll try out the Thalo Blue on my blue jay. If that's not the ticket, I'll order up a bit of Cerulean blue pigment.

Many of Kremer's pigments come in bags, especially when ordering in the 50 to 100 gram sizes. Oftentimes, pigments are offered in various grinds. The Verona Green Earth very fine ranges from 0-80 μ. Standard has a particle size of 0-120 μ. By way of reference, those synthetic organic pigments above range from 0.1-5 μ. Tiny!

Monday, November 29, 2010
Getting Organized
Here's a peek into my latest egg tempera setup.
Each pigment ready to mix. (More jars are on the way.)

I used to keep my egg in a little porcelain bowl covered with plastic wrap. I'd be poking about for something or other to get a bit of egg onto the palette. Now I've got the perfect arrangement!

Each pigment ready to mix. (More jars are on the way.)

I used to keep my egg in a little porcelain bowl covered with plastic wrap. I'd be poking about for something or other to get a bit of egg onto the palette. Now I've got the perfect arrangement!

Sunday, November 28, 2010
Shaky Bird Post

I'm posting from my Droid X this evening as internet is failing via comcast. Then the big machine had trouble booting. Then the Droid locked up. Weird...
UPDATE: Thanks be for the Droid! I was able to confirm that the East Coast is down on a DNS issue. I was also able to find out that I could drop in Google's DNS (8.8.8.8) and voila, my laptop is up and running and I can make a wireless jump to the big machine for images! I've always thought that I could use the smartphone as a blogging backup. It works, but is certainly less than optimal.
So here's a bit of work on the blue jay. I've been reading up on oil painting techniques and perhaps they might apply well with tempera. For instance, simply laying in large areas of color or even just tone. I tried a Gaussian Blur in Photoshop to take out details and see the overall patches of tonality. It's so interesting and exciting to open up to new ways of seeing and working a painting.

Saturday, November 27, 2010
Blue Jay - Starting Color
After a bit more silverpoint, I dropped in some beginning color. Looking forward to the Phthalo blues from Kremer but current stock will do for now. I like how the head is coming but the tail... ah, it looks rather chewed. It may be due for a scraping and sanding if recovery goes as expected.
I seemed to notice the lifting of silverpoint with the first coat of tempera. I somehow had it pegged as more resilient but it took a quick light first coat to hold it well in place.

I seemed to notice the lifting of silverpoint with the first coat of tempera. I somehow had it pegged as more resilient but it took a quick light first coat to hold it well in place.

Subscribe to:
Posts (Atom)