Sunday, October 31, 2010

Getting Started

Some days it's just so hard to get started. Once I'm into it, I'm fine.

Here's a chestnut leaf, one of my early graphites, for a study prior to vellum. I want to slowly get into this, trying to work the form. This new gesso board is wonderful, so smooth and not a pinhole in sight.


Besides starting with too rough a grit, there was a good deal of gesso loading with the sandpaper that was nearly impossible to free. Changing to sanding pads this afternoon provided better results. The pads do load up but a few slaps clear them right up. I'm using fine and extra fine grades that work nicely although I still will need to use 600 grit sandpaper for that truly smooth finish.


This is the time of year when the feeders stay filled. Hours after the first fill, the trees were abuzz with titmice, chickadees, and nuthatches. Sparrows, doves, and squirrels were positioned in place, ready to catch any dropped seeds. A pile of seed on the steps was quickly stored away by the resident chipmunks.

Saturday, October 30, 2010

White, Mica, and Silver

Mixed activities here this evening. First up was a couple of tubes of this white mineral.


Then two more tubes with this lovely red earth laden with mica.


This afternoon I dug out silver wire from my chainmaking days. For weeks I've been thinking that my 0.5 mm Pentel mechanical pencil might make a good holder for silverpoint. 0.51 mm converts to 24 gauge in wire size. At the top of my pile of wire I found ten feet of 24 gauge fine silver! I clipped a piece, smoothed one end, and popped it in to work perfectly with my Pentel!


I'll probably want various gauges but this is a good start. Some tempera artists rough in their painting with silverpoint.


Here's a bit of silverpoint on gesso.


Wrapping up the evening was an attempt to finish one of the new Realgesso boards. I have an email into Realgesso for guidelines but in the meantime I used Koo Schadler's recommendations on the True Gesso site. I found that using the rougher grits seemed to be overkill, creating deep scratches that then took time to remove. Unless I hear different from Realgesso, on the next board I will begin with 320 grit, then 400, and finally 600. Perhaps different grit sizes and techniques are appropriate with boards from different suppliers, as well as when I make my own gesso boards.

Friday, October 29, 2010

New Arrivals

Look what Katharine sent me! On the left is goatskin, on the the right is Kelmscott vellum! Now how cool is that? :-)


Here are a couple of Katharine quotes:

"Suppliers are William Cowley of Newport Pagnell, world-renowned parchmenters (they supplied the ancient-looking vellum for some huge map in Pirates of the Caribbean, no less)."

"... the wondrous William Cowley, who deal in various forms of animal skin for museums, calligraphers, artists, furniture restorers and so forth. It's the most beautiful surface and is very often used by botanical illustrators with watercolour or tempera..."

In this backlit shot I'm trying to illustrate the wonderful translucency of these skins. I had difficulty getting the images I wanted, but we'll be seeing more of these supports. I've picked an older graphite drawing as a start for a tempera piece. I need to decide between vellum and goatskin. I never thought I'd be facing this decision! :-)

Thanks Katharine! :-)


An order of 9" x 12" gesso boards from Realgesso is bringing satisfaction. Fairly smooth. No pinholes! Notice the upper right where I sanded with 600 grit. I was indeed able to reach an incredibly smooth surface and never found a pinhole. Now, I must say that this only one panel and the sanding has been limited but at this point I am pleased with this product. We'll be looking more at these panels soon.


Thursday, October 28, 2010

And More Paint

The results of this evening work. I am learning to work a firmer mix for the pans so that there is less drying and hence less pigment shrinkage. The tubes load better with a wetter mix.


This one reminds me of peanut butter. It has a nice strong mineral smell.


It takes more effort to mull a firmer mix. Soupy mixes are dreamy to mull but what can one do them? Well, they could be used for putting up pigment for tempera.


Here's the view from my doorstep. It looked so pretty this morning that I had to go back for the camera. The yard is really tiny; 16mm is such a generous view. :-)


There were a couple of interesting (actually quite exciting) deliveries today. I can hardly wait to tell you all about them tomorrow! :-)

Wednesday, October 27, 2010

More Paint Making

With good headway this evening, here is progress to date. A nice yellow in tubes and pans, a white that might have leanings into a bit of rose, and an interesting iron oxide. This last pigment is a gift from my dear nephew, Andrew.

A few weeks ago Andrew presented me with a baggie of rust sludge from his mother's well water filter for the horses. This rust is absolutely buttery smooth. Mulling was needed only to mix in the gum arabic. Dear Andrew took a bit of kidding and wonderment as folks really couldn't understand how his Uncle John would want that stuff. Andrew took it all in stride, knowing that his uncle would be delighted, and he was oh so right. :-)


The pans look like chocolates--milk, dark, and white, don't they?

Tuesday, October 26, 2010

Paint Making

I've been meaning to get back to my paint making for some time now. So here's a start! This evening I put up ten half pans of the color you see here. Next will be the tubes, once my pigment mix dries out some. I slipped a bit with too much water.


I plan to work out a few more pigments with pan and tube watercolor, and some with distilled water only, useful for tempera.

I'd like to share these pigments with you. So, if you're interested in some pans, tubes, pigments, or any combination, send me an email with your preference(s) and a shipping address and it will be my pleasure to send you a little Nuncketest package. :-)

Monday, October 25, 2010

Sponged Tempera

The intent for a botanical representation of a fern quickly went by the wayside; it was simply one of those sessions when things didn't go as planned. Remembering guidance from a couple of books regarding the sponging of tempera...

A clipped off piece of kitchen sponge, a bit of egg yolk, three greens and a yellow ochre for a base, titanium white over the frond, and a border of Holbein Brilliant Gold gouache.


This is the fourth panel of six, all so far with pin holes. A similar order from Realgesso--six 9"x12" gesso panels--shipped this morning.

Sunday, October 24, 2010

Egg Yolk

It was nearly 2,000 years ago when egg yolk was first mixed with pigments. That seems like a long time ago but there are records of chickens being domesticated for 8,000 years!


There's some chemistry of the drying reactions that still escapes me but I can see the results. My egg and pigment mixtures dry on the palette rather quickly. I've learned to tip the palette to puddle my mix. I'm looking at small and rounded palette wells. This evening I mixed pigment and water but only used a bit with egg. When that was gone, I mixed more.

You see, unlike watercolor, once tempera begins to set up and dry, there is no bringing it back. It's gummy on its way to hard, no longer water soluble.

From The Chemistry of Paints and Painting by Arthur Herbert Church:


"But the yolk of an egg contains other substances besides albumen. First of all, the albumen present is accompanied by another similar compound called vitellin, which closely resembles it in composition and properties, and which, for our present purpose, we need not further describe. Of albumen and vitellin, taken together, egg-yolk contains, as we have seen, not less than 14 or 15 per cent. But egg-yolk is something more than a solution of these two similar bodies. It is, in fact, an oily emulsion, in which innumerable minute globules of a thick, fatty oil are suspended in an albuminous solution. And, moreover, the amount of this oil is large; for there is 30 per cent, of it as against 15 per cent of albumen and vitellin taken together. Hence it happens that egg-yolk, the usual vehicle for pigments in the best kind of tempera-painting, must be regarded as essentially an oil-medium. As it dries, the oil hardens, and remains intimately commingled with the albuminous substances left behind on the evaporation of the water present. These albuminous substances coagulate and become insoluble in the lapse of time—a change greatly accelerated by the old practice of exposing the finished tempera picture to sunshine previous to varnishing it."

Saturday, October 23, 2010

Around The Lake

It was the perfect afternoon to get out around the lake.


Friday, October 22, 2010

White Oak Leaf Wrap

It's really cool to use a medium that allows for light over dark. Dropping in highlights, softening harsh edges... I'm liking it! :-)


This is my third gesso panel. The first two were smooth with lots of pinholes. This one had a rougher surface with fewer pinholes and a bit of sanding helped smooth it down.

Tempera is pure pleasure. Collecting, studying, and mixing pigments. Practicing brush technique. Reading books on practice and history. :-)

Thursday, October 21, 2010

Andrei Rublev Exhibit

On the ride into work I heard an announcement of an upcoming icon exhibition. I was blown away to hear that work from the Andrei Rublev Museum is coming to the Museum of Russian Icons in Clinton, MA, just an hour up the road! Check it out!

I am only now beginning to explore the world of icons but for an intro see this article on Andrei Rublev.


In celebration, this book is on the way. I suspect there will be more. :-)


This one arrived just today, a lucky find at a good price. And, a lucky delivery as well, as it took two tries to get across the country. More later...

Wednesday, October 20, 2010

White Oak 2


After over-shadowing with a raw umber, ultramarine mix, opaque mixes with white helped pull back the unevenness. Perhaps now some transparent yellows and reds? Shadow lines dropped in for possibly some cast shadows. All painting so far with only a W&N Series 7 #1.

I get so taken away with this medium. A couple of hours slipped by as a blissful blur.

Tuesday, October 19, 2010

White Oak Leaf


Here's a new start with an old drawing. I'm working this one slowly and deliberately. I'm pleased with the lack of blotches--meaning that I am working with a proper brush, nice and dry. I will build up color, shadow, and highlight over time, poco a poco.

Monday, October 18, 2010

New Pigments Arrive!


Aren't these beauties?

Top row: Cobalt Zinc Blue, Yellow Ocher Dark, Natural Black Oxide
Bottom Row: Chromium Oxide Green, Gold Ocher, Luberon Red Ocher

This is the Natural Pigments order, along with a big bag of Rutile Titanium White. Next to arrive is the Sinopia goods.

Sunday, October 17, 2010

English Ivy Wrap


I learned a lot with this piece and it's time to move on. I left this image in a rather large size so we can easily see a couple of issues. Firstly, notice particularly in the shadows the blotchy build up. I think that's from too wet a brush. Then notice the dark spots, pigment particles that didn't mix down very well. Curiously, this inconsistent particle size came from a Nicosia Green Earth aqueous dispersion. If I mull the dispersion will that smooth out the pigment? A yellow ochre dispersion doesn't exhibit that mixed particle size.

I was able to reclaim some earlier shadowing and lay in highlights with Titanium Oxide, a whole new experience considering my brush media have been limited to watercolor.

A last thought, it's important to have a good working image. Oftentimes, tempera painters lay in an ink wash right on the gesso prior to applying color. Some artist even use silverpoint. What's important is to know just where the painting is to go before picking up a brush. Planning matters.

I am expecting an order of new pigments from Natural Pigments to arrive tomorrow. And, there is an order from Sinopia coming after that. By the way, Daniel Smith has a good selection of dry pigments and Dick Blick carries some Sinopia sets as well as the Sennelier line.

Saturday, October 16, 2010

English Ivy Again

I'm retrying last nights English Ivy, this time with an easy, light touch. Many thin coats is the way to go. And, it really works! I'm going back in for additional depth and as for background, not sure yet.


From The Practice of Tempera Painting:

"The secret of ease and expedition in tempera painting may be summed up in one simple formula--Get your tempering right, keep your color liquid, and have your brush squeezed almost dry. In a word, make haste slowly. Tempera painting is as far from the technique of water color on the one hand as it is from the plastic paint-pushing of oil handling on the other. It is much closer to the technique of pencil rendering; and the tempera painter will do well to bear that comparison in mind, and handle his brush as if it were a pencil. When you want to lay a tone in tempera, do not try to float a wash, and do not try to spread the paint out with a brush; but run over the area to be covered with quick, easy strokes, like pencil marks. Follow this first coat with a second, applied in the same way, running the strokes perhaps at a little different angle, according to the form; and continue in this way until you have build up a deep and even a body of color as you want."


Thompson, Daniel V. Jr. The Practice of Tempera Painting. New York. Dover Publications. 1962. (Yale University Press. 1936.) pp. 99-100.

Friday, October 15, 2010

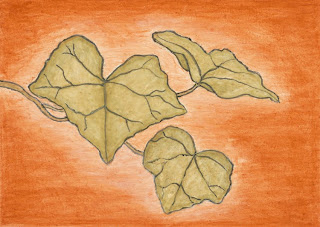
English Ivy

I think I liked this better a couple of hours before I stopped. The leaves curiously looked a lot more interesting and seemed brighter before the background came about. I think I am going to try this one again tomorrow.

I learned that many light coats makes for smooth transition. I've read those instructions but still brushed with a heavy hand. I wish you could see those leaves before I slipped back into full coverage washes rather than selectively applying to select areas.

Another little trick I picked up was using titanium white to highlight. Once the white was in place, a few washes with a transparent pulled it down.


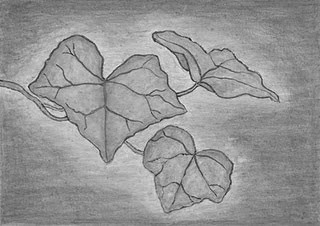
Here's a grayscale that I'll reference for the next cut. Perhaps more tonal variation in the leaves and less in the background. That orangy-red is out too.


In fact, the b/w background might work...


By the way, this drawing was taken from my very first assignment in the Cornell drawing class.

And lastly, after working out the images, finishing this post, and getting wrapped up in a movie, I went back to clean up my palette and found my favorite brush still in water and with its lovely tip bent horribly. Bending it back just didn't work. Holding it straight down under running hot water released the curl!

Thursday, October 14, 2010

Color and Ground (Final)

Okay. I promise. I'm all wheeled out. This last example, beyond the fur of a fox, more akin to a dandelion puff rainbow, is created with mixed paint. Once again, the warm colors win. You know, it wasn't until I moved from yellow ochre and into the oranges did I notice that even my "pure red" was really quite "orangy". Now, I've mixed lots of charts and learned my lessons from my Yellow and Blue Don't Make Green exercises, but it's when I stumble across these principles in examples like this one that I can really appreciate my studies. Simple stuff, now that I know it. And, of course, to be fair, I am playing with black--not a true blue that might allow those other two primaries to sing a bit brighter.


By the way, I moved from store bought to farm fresh eggs. This beginner found no difference in application, although I easily noticed the egg's freshness--a well togethered white, perked up yolk, and tougher shell. Reminds me of my egg farmer days... a laying flock of forty beautiful hens... Ah, the good old days...

Wednesday, October 13, 2010

Color and Ground (cont)

Here's a wrap on the wheel using Vine Black. I like the range of colors better than the previous but it was difficult to pull greens and violets. The yellow ochre was overdone, adding some opaqueness in the transitions. It's all good practice, though. Proper tempering, easy brush release to prevent dotting, waiting for a dry surface before the next coat, becoming aware of death-gripped brush--all these thoughtful little things...


I again tried a wet finger to the gesso in an attempt to eradicate pinholes. Same results--no help at all. Then came sanding with 600 grit CAMI (~P1200) that on first glance appeared to provide remedy. Alas, no luck. The tiny holes were merely filled with gesso dust. Once a bit of tempera was applied, the holes jumped right out.

A quote from one of my main resources seems appropriate:

The secret of success

By the time the gesso has been strained, it will probably be so cool that it will soon set to a jelly. When this happens, place it over the hot water for a moment, stirring it slowly but constantly with the brush, and it will become liquid again in a moment. As soon as it is liquid, take it off the hot water. Never let it stand over hot water a second longer than is absolutely necessary, or you will find your gesso full of air bubbles, if not of worse defects. The importance of this simple precaution cannot be overemphasized.


Thompson, Daniel V. Jr. The Practice of Tempera Painting. New York. Dover Publications. 1962. (Yale University Press. 1936.) p. 27.

Tuesday, October 12, 2010

Color and Ground

I'm retrying the limited palette color wheel with a smaller size and a different black. Soon after beginning last night's wheel I knew I'd taken on more area than needed so now it's a scaled down version. The black, Roman Black, didn't seem to behave as the German Vine Black for my watercolor Zorn palette wheel a few weeks back.

This is the black from last night's wheel (description from Natural Pigments) :
Roman Black, black iron oxide. A natural black earth that is a dense, opaque, heavy color that is absolutely permanent. It is comparatively neutral in undertone, wets easily, and is non-greasy, when compared to carbon blacks. It is a useful pigment when these qualities are required.

And this is tonight's black (description from Natural Pigments) :
Rublev Colours German Vine Black is obtained from the calcination of grape vine shoots, which results in pure carbon with quantities of potassium and sodium salts. The pigment has a bluish black hue and tints made with white have a bluish tinge. Vine black does not have the tinting strength of lampblack, but it has excellent lightfastness.

We can see from the descriptions that Katharine's comment on last night's post nailed the color differences perfectly. The German Vine Black was from a tube of watercolor recently mixed. Remember Val's comment that watercolor paints can be used for mixing egg tempera paint? Thank you both for your wonderful comments!

Looking back, I think I was overly cautious with last night's black, especially when I didn't see it bringing me to greens or violets (like the Zorn watercolor wheel). There was no mixing going on, mostly an overlay of yellow or red onto black. I don't think there was much black over yellow or red.

Here is a start. German Vine Black. Beyond simply laying down linear strokes that seem to bring on some furriness, crosshatching was applied. This wheel will be completed with overlaid strokes. Once this wheel is completed, another with color mixing will be built for comparison.


Can you see all those little white spots? Yup, pin holes. Notice the lower right corner of the image. Koo Schadler mentions in her book that sometimes pinholes can be filled by a bit of light rubbing with a wet finger. I did not achieve good results as rubbing took me right down to the support. More attempts to come with images as well.

So you can see that we're balancing a few simultaneous subjects--ground, pigment, and technique. A bit of research, a bit of work, it will all come together in time.

Monday, October 11, 2010

The Stuff Arrived!

A big box of stuff! I wasted no time degreasing a gesso board and cracking an egg. The board looked great, so white, so smooth. And then I began to notice the pin holes. This image is a bit over lifesize but not by much. The photo surprised me--I hadn't noticed so many holes. I really wanted to paint and really didn't want to mix gesso so just went ahead and painted. After all, I thought, it would be good to know what painting pinholes looks like.


Using aqueous dispersions of black, white, yellow, and red, I tried a limited palette. No color mixing here, just layer over layer. It was very good brush practice--don't load the brush, lift off when the stroke ends, wait until dry (about five seconds) before the next coat...


I expected greater color range with the black but really like the yellow into red with rich luminosity. There's a bit of black about the circumference and a little white in the center.


Sunday, October 10, 2010

An Excellent Tempera Book

I've just completed my first read of Egg Tempera Painting by Koo Schadler.

A snippet from today's email to her:

"I particularly enjoy your open-minded approach. Perusing the web for information naturally brings up differences in technique and I like how you present what works for you as well as others approaches. Considering various supports, recipes, work styles, climate, etc, all seem to influence results. What I get from you is that each person needs to find what works best for them. Also really enjoy all the web and book references--tremendous resources."

She describes her spiral bound book as always a work in progress. New material not yet incorporated into the general text is added in the back. I think that for anyone getting started her clear instructions provide all the details needed to start from a wood panel and take one to a finished painting. Supports, grounds, pigments, techniques--all covered well.

On another note, Natural Pigments recently offered free shipping on orders over fifty dollars and I simply couldn't resist picking up a few pigments:
  • Chromium Oxide Green
  • Cobalt Zinc Blue
  • Gold Ocher
  • Luberon Red Ocher
  • Natural Black Oxide
  • Titanium Dioxide
  • Yellow Ocher Dark
I also picked up a 2' x 4' sheet of 1/4" birch plywood primarily for practice work. It's really too thin for use as a proper support without bracing of some sort unless perhaps I work with small pieces.

Saturday, October 9, 2010

Ground

Yesterday I mentioned supports and described two that will soon arrive. Although the gesso board will come in nearly ready for use--that is, with its ground already applied, the birch panel will need attention.

Firstly, the bare wood will receive a coat of rabbit skin glue. (Note: Click on images for product details and a whole lot more. Natural Pigments really rocks!)

There are differing opinions on whether to use whiting with this first coat, but if so then only minimal whiting will be used. A second coat may use a richer mix. Fine Ground Calcite, aka Chalk, will be on hand. These first coats require something like a day each for drying.

After the second coat, I may then move to a regular mix of whiting and glue, a normal gesso recipe, or simply use a prepared gesso mix, Easy Gesso. I will be using the Extra Fine grade for a smoother finish. Any coats after the second are applied after a short setting time.
I have read in a few places that the building up of gesso panels from scratch is really not that formidable of a task. The process requires attention and patience but it sounds as though once one has the knack of it that many panels can be built up quickly.

I am rather short on details at this point, trying only to gain an overview before I move deeper into the details. Koo Schandler's book arrived today and will be my reference on details. More on that rich resource very soon!

Friday, October 8, 2010

Supports

Supports for egg tempera come in a few flavors--hardboard, wood panel, and plywood. Hardboard is tricky as only the untempered is considered archival and it seems that most these days have some kind of treatment. Wood panel is cool as long as there's no splitting. Good quality plywood, and probably with some backing support strips, sounds to be ideal.

I have two supports coming in from Natural Pigments. The birch panel is actually a sheet of birch plywood with backing support strips. Here's a picture that links back to the catalog. It's a real beauty, isn't it?


Along with this panel is coming a half dozen gesso boards. These are untempered hardboard fully coated and ready to go. Well, almost ready...

Koo Schandler's post on the EggTempera site explains that gesso boards need to be carefully examined for scratches and pin holes. Light sanding and wetting to smooth the pin holes should take care of that. Next the edges should be chamfered to prevent chipping--NP's board come chamfered so that's done already! Lastly, the board needs degreasing with a wipe down with denatured alcohol.

Thursday, October 7, 2010

Titanium White

White is an important color. Totally new to me, of course, with only a bit of watercolor experience. I'm reading that often times pigments are mixed with white.

The white most commonly used is Titanium White, PW6, Titanium Dioxide, a powerful and opaque white. I mulled up a bit for last night's painting and got that stuff everywhere! I mean, it sticks to everything! Reminds me of painting the house trim with an oil base white paint.

There are references to mixing dry pigment powder directly into an egg yolk and water mix. There are also examples of using prewetted pigment, either mulled or not, for mixing. And then there are of course aqueous dispersions. What this means is that it is not clear what method(s) I will eventually adopt. I will read my books and try out the possibilities. It seems that there is no one right way to go about egg tempera so one must find one own best path.

I anxiously await my supplies and books. I am cautiously looking into other sources for pigments, knowing how easy it is to overload on pigments. How about a little bit of Zorn palette in egg? Or maybe a few other simple palettes? We'll see...

Wednesday, October 6, 2010

My First Tempera

Rather than wait for my real gesso boards and aqueous dispersions, I threw caution to the wind and mulled some Titanium White pigment, mixed it with egg and water, and spread a coat over a hot pressed 140 lb Artistico block. The paper buckled and took nearly an hour to dry out. Further washes surprisingly caused more buckling; my expectation was that the first coat would seal the paper.

I had only a few pigments with which to work--Umber, Titanium White, Verona Green Earth, Red Ochre, and Carolina Yellow Earth, so I used them all. :-)

About three hours last night and another this evening.


Tuesday, October 5, 2010

Resources

Here is a point in time collection of web (in no particular order, for now) and book resources focused on egg tempera:

Egg Tempera Making Demo

Koo Schadler

Society of Tempera Painters

Realgesso

Guerra Paint and Pigment

Artist Materials Information and Education Network (AMIEN)

Sinopia Pigments

Natural Pigments

True Gesso

Kremer Pigments

Prosopon School of Iconology

The Luminous Brush


These books are en route to my library:


A new book Amazon purchase. Author is an AMIEN forum moderator.


Available on the used market, my copy is coming in from CA.


Purchased on the author's web site.

Monday, October 4, 2010

Aqueous Dispersions

I'd like to try working with aqueous dispersions. Having pigment ground and ready mixed with water will ease my paint making with egg tempera. For watercolor, it is a simple matter to fill tubes and pans--no matter how much is mixed, it is all easily stored. Egg tempera is not so accomodating--whatever's mixed must be used in a few days. Being able to simply shake up a bottle and squeeze a bit of pigment saves a good deal of pigment mix and mess.

I am saturated with egg tempera technique and theory. Three more books are on the way. Natural Pigment just emailed that my order has shipped. I am so looking forward...

Here's a great article on aqueous dispersions.

Sunday, October 3, 2010

Support and Ground

Let me begin by saying that the MonaLisa Gessoed Art Board by Speedball does not offer a proper ground for egg tempera.

Gesso is a much maligned term these days, referring to grounds from gypsum or calcite bound with hide glue, to 100% acrylic dispersion polymer, and sadly over to various acrylic concoctions with no proper claim at all to this term. This last monstrosity coats my "gessoed" board. In all fairness though, the product's packaging does not specifically state use for egg tempera. I could be a bit guilty of making leaps in my excitement to get started.

Last night I knew I was in trouble when my palm lifted dried tempera right off the surface. Using the tip of my palette knife I could push the pigment loose. As a rank beginner, I thought I'd do a bit of research before coming to hysterical conclusions. I hit the books late last night and again this morning. Long story short, I have every right to hysteria and Natural Pigments can satisfy every possible need for me to practice egg tempera in true fashion. Leaving out the details of the hows and whys for now (they will come once I have regrouped), here is my order list:

Item 1
Product ID: 209-002
Product Name: Basic Dispersion Set
Product Price: $70.00
Quantity: 1

Item 2
Product ID: 920-BP0912
Product Name: Birch Panel (9 x 12 in.)
Product Price: $12.25
Quantity: 1

Item 3
Product ID: 510-11CHK1K
Product Name: Chalk (Fine Ground Calcite 1 kg)
Product Price: $6.85
Quantity: 1

Item 4
Product ID: 510-12ESGXX
Product Name: Easy Gesso Extra-Fine (500 g)
Product Price: $13.50
Quantity: 1

Item 5
Product ID: 926-HB0912
Product Name: Gesso Panel, Hardboard (9 X 12 in.)
Product Price: $9.15
Quantity: 6

Item 6
Product ID: 624-2190
Product Name: Half Pans (10/Pack)
Product Price: $2.95
Quantity: 3

Item 7
Product ID: 510-21RSGL5
Product Name: Rabbit Skin Glue (500 g)
Product Price: $12.50
Quantity: 1

Item 8
Product ID: 651-SFKN080
Product Name: Surface Knife (80 mm wide)
Product Price: $8.00
Quantity: 1

Please note that the glue listed here is not really from bunnies (although in some cases may) but a trade term for high quality hide glue. That somehow makes me feel a bit better, although am thinking that a good acrylic ground may be in my future.

The pans are for my watercolor adventures, an experimental alternative to tubes.

So although my ground proved unusable, I did gain experience with my paint. There seems to be a sweet spot between too eggy and too watery, something like not too sticky and goopy on the brush, and too wet to lay down precisely. Even on that non-stick surface, I could reach a point where the tempera would flow nicely in a stunningly fine line. I used brush sizes 1, 0, and 00. Below is a closeup of an area where I used fine strokes in an attempt to simulate translucent and tiny veining. Note the example of pigment literally sliding across the support.