Apologies for the lack of images this week but tomorrow I will post my work. By the end of day yesterday, I was less than satisfied with where my painting was going. (I think that was reflected in yesterday's rather short-winded and less than enthusiastic post.) Today was a joy! Although I can still see plenty of problem areas, I made good progress with stone work and then worked more on the egg. Bless Koo for all her encouragements--both with what is accomplished as well as setting up next step expectations.
This morning's discussion delved into scumbling and glazing. These were presented in last week's workshop but this week we take them to action.
Scumbling with a very thin layer of titanium white helps to pull the value and chroma together while generally cooling the temperature. The "very" in very thin is important. What looks like almost no white at all can be most apparent when applied! Today I used a few scumbles on the egg and I'll probably do more tomorrow.
Glazing a very light layer of paint can affect value, chroma, and temperature. I used glazes of prussian blue, alizarin crimson, and burnt umber on the background. I used a glaze of yellow ochre on the egg. Also glazes of burnt umber and prussian blue on the stone. Green earth glazing was applied for half tones on the egg. Tomorrow, per Koo's advice, I will apply green earth glazing across the background and egg to unify, to help the egg to not jump out so much.
Next was a demonstration on lettering. Koo showed us a few techniques, from painted on, to scratched down lightly to a base color, to developing incised characters. Good planning and attention to detail are essential!
I'm working to build lost edging on the egg. That's most interesting and needs a good bit more attention.
I am discovering how much there is to learning to see form by being aware of value. Subtle (to me!) variances were coming into view after being pointed out by Koo and a fellow artist.
More tomorrow as my second week wraps up. Bittersweet, it will be.

Thursday, June 30, 2011
Wednesday, June 29, 2011
Egg Tempera III
This morning Koo talked about portrait painting--pigments and mixes for flesh colors. Although I'm not painting a portrait, I still need to render form with my egg. Koo showed me how to apply light layers of green earth for coolness in the half tones.
Today I got in plenty of painting. I went through cycles of messing up and recovering the background. Later I stenciled in the egg and applied form. Before leaving, I dropped in a start on the stone.
Once again I forgot my notes! Got all kinds of carried away painting and didn't think to snap a photo.
This evening I'm reading Egg Tempera Painting, A Comprehensive Guide to Painting in Egg Tempera by Koo Schadler. It dovetails beautifully with this week's workshop. For anyone interested in egg tempera, it's a must have.
Tuesday, June 28, 2011
Egg Tempera II
Today's workshop session began with a discussion on transfer paper. Graphite can be quite messy. For a commercial solution, Saral works great. It comes in colors, really individual pigments with their own properties. It may be hard to see but in my painting I am using white Saral to stub in the egg in the middle. One can also make transfer paper by mixing dry pigment with denatured alcohol to a creamlike consistency and painting it on tracing paper.
Sorry about the image quality but I'm working from my Droid X. In my painting, I'm mixing chromium oxide green into three colors using burnt umber, cadmium orange, and yellow ochre. You can see those three mixes in action here, creating the radial gradation. I'm also glazing with alizarin crimson, prussian blue, burnt umber, and raw umber. There are even a few scumbling layers with titanium white. All my paint application has been with cosmetic sponges.
I'm polishing occasionally with cheesecloth. It adds a wonderful evenness and eggshell shine, a real glow with depth.

There was much discussion on proper medium (egg and water) and proper tempering (medium and dry pigment). After that came information on true gesso boards, which can nicely be described as a paint! Pigment (inert white substance, either gypsum or chalk), binder (animal water-based glue), and vehicle (water).
Later in the day came an awesome demonstration on faux finishes. First came stone-like finishes and then texturing, stenciling, pressed patterns, dragged 80 grit sandpaper, Saral imprints and transfers, you name it! The session ended with us imagining our own possibilities.
Monday morning I felt I'd already learned enough. Monday afternoon left me saying the same thing. Today, I am completely blown away! An incredible amount of wonderfully presented material. And in between all this, there were 11 of us painting away with Koo repeatably coming around to offer individual coaching, advice, and pats on the back.
Monday, June 27, 2011
Egg Tempera I
We are already painting! Ya, really! Selecting an image to paint, reviewing it individually with Koo, mixing pigments, and applying paint to gesso board. Done! Maybe that's how I got so excited that I forgot to bring home my notes. No worries though, as I can wing it.
A good part of the day's start covered material similar to that presented the previous week, particularly the characteristics of individual paints. We did go more into detail regarding the handling properties, particularly transparency versus opacity. Some pigments are quite simply bold as brass, others meek and shy--important to remember when mixing.
Koo demonstrated how to handle the egg, mix it with pigment, and apply to the gesso board. She showed how to pick up paint with a cosmetic sponge and apply using dabbing motions. Then came glazing layers using alizarin crimson as well as viridian, both transparent pigments. Lastly, she scumbled on titanium white.
I have picked a rather simple model for my painting, an egg on a piece of cloth on a piece of stone. There will be a radially gradated background around the egg. Although not complex, this model will embody a good many practices--gradated background using mixed pigments and glazing, faux finish stone work, repeated masking, and form detailing (on the egg).
There are to be many more demos and a good deal of painting. Along with forgetting my notes, I just now realize that I have nothing to scan. My gesso board, along with all my supplies, are left behind in the store. (This week we are working out of the Collins Art Center, not the restaurant.) So what I will do is take occasional pictures of my gesso board for a work in progress.
After the morning session, I felt that I had already picked up a couple of gems:
- Seeing the art of proper tempering was illuminating. I've been lax in adequately mixing the egg with the pigment.
- Sponges are used to dab on paint, not spread it. Somehow that practice had eluded me!
Sunday, June 26, 2011
Ready To Go, Again
 |
| Sweet Pepperbush Clethra alnifolia |
Just like last week, there will be nightly reviews of my notes.
I'm ready and very excited!
Saturday, June 25, 2011
Lighting
Koo also provided handouts of articles she's authored for The Artists Magazine. Lighting Your Studio from the October 2010 issue provides excellent thoughts on handling lighting in the studio.
Summarizing, when selecting lighting, look for Correlated Color Temperature (CCT) around 5,000K and Color Rendering Index (CRI) of 90 or better, 100 being the best.
I've poked around quite a few manufacturers's sites for compact fluorescent bulbs and these from BlueMax look interesting: http://www.bluemaxlighting.com/compact_fluorescent_39_ctg.htm
BlueMax was the only manufacturer I found that supplied both CCT and CRI. Most had some fancy lingo and no hard numbers. (BlueMax did report that Ottlite has a CRI of 95.)
Three of these are on their way:

Friday, June 24, 2011
Old Master Design V
Our last day started with a discussion of sacred geometry. Golden Ratio, Fibonacci Series, and Armatures (Golden Spiral and Bouleau). We learned to build a Golden Rectangle and a Root Rectangle with calculator, proportion wheel, and geometry. We also learned to build Golden Spirals. We built a Bouleau Armature and laid it over an Old Master painting, testing for applicability. My example didn't show much correlation but others' did. I'm leaving out all the details but perhaps later I'll get to some.
Koo encouraged us to become familiar with the characteristics of our paints--transparency/opacity, staining, toxicity, warm/cool, chroma, inorganic/organic.
There was more discussion on form:
Highlight - opaque, cool
Local color - semi-opaque, warm
Halftone - semi-transparent, cool
Shadow - transparent, warm
There was a great presentation on Imagery and Content. I have supporting documentation which is fortunate as my note taking slipped during animated discussion.
So here it is. Five days of lecture, discussion, and hands-on exercise. Please don't feel these five posts at all possible of capturing my rich learning experience. I will over time explore various principles as well as try to coalesce groups of principles and present them out with this workshop's labeling.
Thank you's go out to:
Collins Artworks, Steve and Sherry Collins, for hosting this workshop. You know how to make it look easy. True Professionals.
Denise, Dorothy, Rick, Sherry, and Marilyn. My fellow students, all extremely talented professional artists. I learned from each of you. And thanks for all your support!
Koo Schadler. An incredible ball of energy. You entertained while teaching. I am in awe of your knowledge. Thank you for sharing so freely. You're the best!
Thursday, June 23, 2011
Old Master Design IV
Today began with Shapes--positive and negative. Shapes don't necessarily mean an apple or a cast shadow. Think about a contained shadow on the apple merging with the apple's cast shadow. Shapes should have interest, aesthetic value. Positive and negative shapes should fit like a jigsaw puzzle. Watch out for small, fussy shapes. Look to Vermeer for good examples.
Lost and found edges, weaving in and out. Cast shadows and contained shadows or local darks presenting and hiding edges.
Watch for straight lines; there are often many to be found. Watch out for averaging out small straights into larger curves. Be careful not to have lines sunken in.
A good test for design is one that holds beauty as it moves from color to black and white to line only.
Decorative patterns. Notice them juxtaposed with flat or volumetric areas. Keep the pattern values close together. Can be stenciled right on top--that is, not necessarily following form.
Perspective. Oftentimes, portraits are elevated in relation to the horizon line. The horizon line is the artist's eye level.
This evening I have presented a rather capsulated and non-illustrated reflection. There were exercises with line based with take home as well as workshop material so it would be less than illustrative.
What is really going on with me, though, is that I am beginning to see how all these design principles are interlocked. It's not just warm/cool, or light, mid, dark, or cast shadow, or cool/warm/cool/warm of form, or interesting shapes, or any other principles. There is no taking away that the analysis is important, but the cohesive event that one experiences in an instant, the gestalt, is where it's at. It's a tool that one can practice for a lifetime.
Wednesday, June 22, 2011
Old Master Design III
Value. Tone. Broken into three levels: Light, Middle, and Dark. Not be confused with highlights or contained shadows. These are values of the local color of an object. Remember that black hat? That's a good example of a Dark. A white collar is a Light. A middle, well, you get the idea.
The concept is to see aggregations of levels. For example, in this first exercise we are asked to increase shadows so as to break up the lights. Note on the left how I shaded under the jaw and cheek? See how it broke up that light mass?

In this next exercise, I added highlights to the massive black cloak and inner garments.

In this exercise, this image was overlaid with a transparent sheet and I painted the massive tonal areas.

Here is what I came up with. With this kind of exercise, one must learn to average levels so as to come up with so few levels. This of posterization using Photoshop.

Some thoughts on value levels:
Create relationships of flat and volumetric shapes. Flat shapes often occur in portraits and are usually black. Think of cloaks or hats.
Extreme values of white and black are often held back to the end of the painting when they can be applied judiciously. Just small amounts can help to make a painting pop.
Be observant of massing--that is, areas of similar tone. Try to link cast and contained shadows.
Controlling values. Two main methods:
Scumbles. Semitransparent layer of opaque white. Sounds like an oxymoron, doesn't it? Thing is, if an opaque pigment is applied thinly enough, it will still have some degree of transparency. A scumble lightens values, decreases chroma, and softens edges. It is a unifying agent. It cools the underlying color.
Glazes. Transparent layer of color. Inherently transparent pigments work best but even opaque pigments can work if thinned enough (like scumbles). A glaze darkens values and creates luminosity.
If this seems like less than a day's activities, it is only because I am awash in information. Without time to reflect properly, I feel that I can't relate enough. And yet, I must present while it's fresh in mind. Distorted reflections! :-)
In the big picture, I am leaning so, so much, having a wonderful time, and getting to know some really great and talented people.
Oh, and one last thing, something that just came to mind that slipped by yesterday. Koo was talking on cast shadows and pointed out how a couple of figures in a painting did not have shadows. Angels. Ethereal beings don't cast shadows. That just got to me...
The concept is to see aggregations of levels. For example, in this first exercise we are asked to increase shadows so as to break up the lights. Note on the left how I shaded under the jaw and cheek? See how it broke up that light mass?

In this next exercise, I added highlights to the massive black cloak and inner garments.

In this exercise, this image was overlaid with a transparent sheet and I painted the massive tonal areas.

Here is what I came up with. With this kind of exercise, one must learn to average levels so as to come up with so few levels. This of posterization using Photoshop.

Some thoughts on value levels:
- Lights are generally cool whites and grays.
- Darks are generally warm blacks and browns.
- Try to use a limited range of values within each value level. Keep it simple.
- Work towards less value distinction in detail.
Create relationships of flat and volumetric shapes. Flat shapes often occur in portraits and are usually black. Think of cloaks or hats.
Extreme values of white and black are often held back to the end of the painting when they can be applied judiciously. Just small amounts can help to make a painting pop.
Be observant of massing--that is, areas of similar tone. Try to link cast and contained shadows.
Controlling values. Two main methods:
Scumbles. Semitransparent layer of opaque white. Sounds like an oxymoron, doesn't it? Thing is, if an opaque pigment is applied thinly enough, it will still have some degree of transparency. A scumble lightens values, decreases chroma, and softens edges. It is a unifying agent. It cools the underlying color.
Glazes. Transparent layer of color. Inherently transparent pigments work best but even opaque pigments can work if thinned enough (like scumbles). A glaze darkens values and creates luminosity.
If this seems like less than a day's activities, it is only because I am awash in information. Without time to reflect properly, I feel that I can't relate enough. And yet, I must present while it's fresh in mind. Distorted reflections! :-)
In the big picture, I am leaning so, so much, having a wonderful time, and getting to know some really great and talented people.
Oh, and one last thing, something that just came to mind that slipped by yesterday. Koo was talking on cast shadows and pointed out how a couple of figures in a painting did not have shadows. Angels. Ethereal beings don't cast shadows. That just got to me...
Tuesday, June 21, 2011
Old Master Design II
Today's discussion began with concepts of the color black, a true color and one that plays an important role. Not as a shadow, but as the local color of an object--coat, hat, whatever. By using black, one is assured of reaching into at least one end of the tonal scale. It's also a fine desaturizer as well. Remember my Zorn palette posts where I got greens from vine black with yellow and violets with red?
Further talk on Old Master palette opened up the possibility of considering green as a fourth primary--or maybe at times a replacement for yellow.
Below is a color exercise that takes me back to my "Yellow and Blue Don't Make Green" exercises. Although for today's exercises we used high chroma pigments, we were encouraged to try replacing warm yellow (cad yellow) and warm red (cad red) with yellow and red ocher. Below you can see that I tried out the yellow ocher. Good stuff.

We were encouraged to understand our palette. For each pigment, what is the chroma, temperature, and value?
I think this might be a quote from today, "Beautiful color comes from relationships." Establish relationships by using lots of low chromas and neutrals. Use areas of warm and cool.
Next up was light, beginning with cast shadow principles--sharp delineation at source, diffusing as shadow extends; mimic shape of casting object; express a definite end; show a bit of warmth in deepest shadows; incorporate a "light accent" by presenting extra light on the forward edge at the start of cast shadow.
Below is an exercise that not only had one thinking about cast shadows but applying principles of perspective to place the shadows realistically. By realism is not meant "exactly right" in a mathematical sense but close enough not to draw uneasy attention.

Continuing with light, we studied highlights. Correct placement is a good start but one must consider that a highlight diffuses--it's not just a hard-edged dot. You can see my reminder note to myself. Also, I hadn't considered all the places a highlight could appear on the vase. I think that this kind of exercise is so very useful as I think I will now be looking, simply looking and seeing, in better style.

Today's final exercise involved creating our own tonal scale from a model. Not bad, but I did have a bit of a leap between the third and fourth down. That's when I flipped direction and wrapped up by coming in from the black. Still, pretty close.

Note that although I have mostly been presenting today's session from the exercise point of view, each subject began with lecture. I should also mention that we have a textbook of Koo's creation that follow the workshop perfectly. Another student and I were comparing experience, both of us remembering Koo's exact words as we read her textbook last evening after class. In other words, super reinforcement.
Thought that was it? Nope! :-) Next we took on reflected light. Shiny objects, from highly reflective metal and mirror that capture fine detail to softer objects with more amorphous shape.
Lastly, we began looking at Value, the most important element of interest. A well designed painting based on fine value will stand up without color. Fascinating thought, isn't it?
Monday, June 20, 2011
Old Master Design I
Today was the first day of my first in-person workshop. I'm still grinning ear to ear.
Let me begin by presenting this article by Koo Schadler, a fine prelude to course content. From this comes a sense that great masterpieces are most made of great design.
The first design principle presented was the limited palette of primaries, black, and white. The primaries may be split into co-primaries, a warm and cool version of each. Continuing, there is a preponderance of low chroma with small bits of high chroma. Also, lots of neutrals.

A hands-on exercise in acrylics (the medium of choice for all this week's exercises) of making neutrals by mixing primaries with complementaries, brown, black, gray, and white helped tie theory and lecture to hand and eye. "Killing chroma" was the motto.
The second design principle introduced warm versus cool relationships as large-area visual opposites. This was not to get mired in detail but to pick out the overt masses of relative warmth and coolness.

A hands-on exercise had us painting onto clear acrylic above an old masters image. Blue for cool, orange for warm.
Please understand that this is a very roughed out version of today's incredibly rich presentations. Koo is as kind as she is fascinating--completely giving of her knowledge and obviously brilliant on her subject.
At this time, I feel that if I had a day between each day of coursework that I could better present the material, but there's no down time. I may be expanding here on these workshops long after they have finished. In the meantime, I am having an absolute blast!
Sunday, June 19, 2011
Ready To Go

I am very excited about my upcoming workshop! My supplies are assembled and packaged up. Tomorrow's the first day of Old Master's Design. I'll tell you all about it in the evening.
Saturday, June 18, 2011
Hummingbird
After being nearly carried away by mosquitoes while searching out late light shots, I was driven higher up onto the deck. This hummer perched for a good long while at the top of an overhanging oak, picking up some the day's last light.


Friday, June 17, 2011
NESBA Hosts ASBA Conference
Each year the American Society of Botanical Artists (ASBA) pulls together an incredibly rich conference of workshops, demonstrations, lectures, exhibits, functions, tours... You name it, they do it! This year's conference is hosted by the New England Society of Botanical Artists (NESBA), and although I'm a newbie here, something tells me that this will be the best Conference ever.
I know that not all of you, dear readers, are artists or USA based but I do hope you are all interested. So please check out the series of blog postings on NESBA's hosting of the ASBA 2011 Conference.
And although the Conference is not scheduled until October, this weekend is when members get to register for all the upcoming activities.
Thursday, June 16, 2011
Renewal
It's been the first warm and sunny day in some time, a real treat after a long day at work. Walking just a short ways up my road, I was presented with so many creatures made new to the world this Spring.


Wednesday, June 15, 2011
Pear In Place
This is basically the same image from a couple of days back. I erased the bottom shelf and some of the sides and moved that up to better contain what was to be the pear. Then I had to add stone work to top and bottom to fill in.
I'm really not that pleased with the rough stone background. I don't feel it fits with the look of the arch and pear but I don't know yet what to replace that with, if anything. Perhaps simply moving to larger blocks to reduce the business?
Also want to raise the viewing angle to give a peek onto the shelf. That will allow me to better show a curve to the stonework behind the pear and add shading appropriate to that curve.

Tuesday, June 14, 2011
Pear With Single Source Lighting
This image could come in handy as I work to assemble a composition for egg tempera. The cardboard box comes through again!


Monday, June 13, 2011
More Stonework
Just a bit more to wrap up this sketch and then I'll be on to another. Next up will be a shorter centerpiece, perhaps with an "open window".
Oh, and I need to get a pear into my cardboard lightbox for a lighting study.

Oh, and I need to get a pear into my cardboard lightbox for a lighting study.

Sunday, June 12, 2011
Sketching Experiments
Here's a bit of a replay on yesterday's sketch working with actual board dimensions of 5x7". There will be more coming especially to work out compositional dimensions and placement. But for now, it's a good exercise in layout practice and studying possible lighting. It's a lot of fun as I begin to play around with individual blocks.


Saturday, June 11, 2011
Sacred Geometry: Trinity
One circle makes a Circle.
Two circles make a Vesica Piscis.
Three circles make a Trinity--and three Vesica Piscis.

Here is the pattern more commonly seen in a religious setting. They're within Saint Mary's doors and windows.

And here's a little rough sketch of an idea I have for my egg tempera workshop. I will redraw this up properly with a board and t-square and compass. I suppose I could scale the pear anywhere. Suppose it was only a third that size? Then there's the matter of lighting. I may have to build models...

Friday, June 10, 2011
Vesica Piscis and Saint Mary's Church - Part 2
Quoting and including an image from the Wikipedia article on Vesica Piscis:
Here's a technical drawing I put together as a bridge between the illustration above and the worked over scanned image below. Notice here that the succeeding arcs all build upon the same point (either A or B). On the innermost arcs I let them continue lightly to complete a full vesica piscis.

Now that we have established the mechanics, lets apply this to the main entrance of Saint Mary's Church. To better illustrate I have allowed the arcs to continue all around and darkened the middle arc area. It's all quite on the mark. Sacred geometry at work.

These past few days of visiting and photographing the church and drawing and studying this aspect of sacred geometry has left me sensitive to curves. I begin to notice curves everywhere. Squared off doors and windows of "regular" buildings feel plain and disappointing.
"The vesica piscis is a shape which is the intersection of two circles with the same radius, intersecting in such a way that the center of each circle lies on the circumference of the other."
Vesica Piscis - Wikipedia
"The mathematical ratio of the width of the vesica piscis to its height is the square root of 3."

Here's a technical drawing I put together as a bridge between the illustration above and the worked over scanned image below. Notice here that the succeeding arcs all build upon the same point (either A or B). On the innermost arcs I let them continue lightly to complete a full vesica piscis.

Now that we have established the mechanics, lets apply this to the main entrance of Saint Mary's Church. To better illustrate I have allowed the arcs to continue all around and darkened the middle arc area. It's all quite on the mark. Sacred geometry at work.

These past few days of visiting and photographing the church and drawing and studying this aspect of sacred geometry has left me sensitive to curves. I begin to notice curves everywhere. Squared off doors and windows of "regular" buildings feel plain and disappointing.
Thursday, June 9, 2011
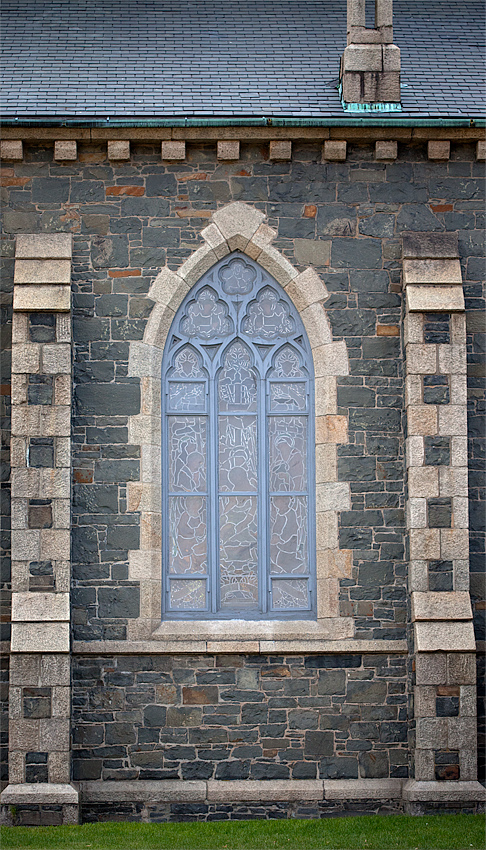
Vesica Piscis and Saint Mary's Church - Part 1
Last weekend on my way to pickup Timothy's food from the vet (he's on a special diet after a couple of urinary blocks some years ago), I noticed the shapes of the doors and windows of Saint Mary's Church in Taunton. Last night I returned for photos.
Late this evening I have printed some of the images and applied a few lines and then the compass. All I can say is that I know I must check my work but I can't help but be excited. If I'm working things right, I have found vesica piscis in this architecture.
Tomorrow I will redo my work and if all holds up will scan and present the results.
 |
| This photo from Wikipedia. Below are my shots. |
Late this evening I have printed some of the images and applied a few lines and then the compass. All I can say is that I know I must check my work but I can't help but be excited. If I'm working things right, I have found vesica piscis in this architecture.
Tomorrow I will redo my work and if all holds up will scan and present the results.
 |
| A perfect fit |
 |
| Not tested |
 |
| My favorite but doesn't seem to fit sacred geometry |
 |
| Above the main entrance |
 |
| Not tested |
 |
| Main entrance - another perfect fit |
Wednesday, June 8, 2011
Yarrow
Common Yarrow, Achillea millefolium, of the Aster (Asteraceae) family is a familiar wildflower around the lake. I have recently and quite accidentally stumbled upon insects in relationship with flowers. I notice many tree leaves already munched on. It all puts me in awe of the interdependence of the species, of how this dance all works in harmony.


Tuesday, June 7, 2011
Silvery Cinquefoil
This evening brings a new discovery! Silvery Cinquefoil, Potentilla argentea, of the Rosaceae (Rose) family.


 |
Monday, June 6, 2011
Lessons Learned
Yesterday's fern work was a fine learning experience.
I'd really not considered my support when I mixed my pigments with chalk and watercolor medium. The milkweed paper is so very rough that a light consistency paint had little chance to attach. Acrylic paint, applied to the ferns thickly with a 3" brush, bound and filled nicely.
I most often mixed a tube color with titanium white, sometimes adding another color. My mixing took place on palette simply by spreading the paints around with my brush. All the streaks of paint looked so fantastic but were lost to a homogeneous hue when brushed onto the fronds. Not sure how I could keep that wonderful detailing.
Using the same frond proved advantageous as after a couple of layers of acrylic dried out, stiffness and durability increased, leaving me to wonder if it wouldn't be good idea to precoat and let dry as a primer.
As the fronds were so big, I was concerned about paint drying before I could completely cover it and spritzing helped there.
Negative painting might be interesting. I could probably use a light consistency paint and throw it with a brush. I wonder about airbrushing?
Just generally random thoughts...
Sunday, June 5, 2011
Ferns on Milkweed Paper
Yesterday's preparations were quickly tossed by the wayside when the paint resisted application--too thin and not enough. Out came the Golden acrylics, big gobs of the paints mixed right on the palette with a house painting brush. That thick, luscious paint went so nicely on my cinnamon fern fronds.
 |
| Cinnamon Fern |
 |
| Milkweed paper mounted on foamcore |
 |
| First color applied |
 |
| Next color applied |
 |
| Final two colors applied |
Subscribe to:
Posts (Atom)