Monday, December 24, 2012

Merry Christmas

After a few months of introspection, I think I'm back. More on the details in upcoming posts but for now I'd like to share inspiration by way of my teacher, my mentor. Some time ago she was standing over me and quoted while I worked through an old master design exercise:

"Begin by adorning yourself with these vestments: Love, Reverence, Obedience, and Constancy."

Cennino d'Andrea Cennini 1370-1440

You know those moments when time disappears and your art is really working? That quote reminds me of this.

Friday, October 5, 2012

Viridescence

I have a few pieces on display at Cornell University's Alfred R. Mann Library. Marcia, my instructor for all three botanical art classes, recently brought this exhibit together. It couldn't have been any easier for artists. All I had to do was was place high resolution images into my public Dropbox!

For details on each course, see the links at the top right on my blog.


Sunday, September 23, 2012

Momentum

After a few weeks of focusing on my first still life, I felt the vacuum upon calling it done. I did have a couple of limited palette charts that needed wrapping up.

In this first chart the center row contains the starting pigments. Columns 1, 4, and 7 are the tubed colors, others being mixed neighbors. Kind of amazing the color range!

Yellow Ochre, Ercolano Red, Ultramarine Blue
Mixed with Vine Black or Titanium White

This second chart is certainly a more subdued version and seeing that I used Vine Black for blue, I left out darkening with black, going only for tints with Titanium White. It might sound odd but I can stare at these charts for the longest time, imaging the worlds that could be built with such a humble set of pigments.

Lemon Ochre, Burnt Umber Reddish, Vine Black
Mixed with Titanium White

In an effort to keep work ahead of me, I started a couple of studies. This first is based on an painting by Adriaen Coorte. Many of his paintings make use of a table top, mostly of stone. I like his warm/cool methods and I'm trying to apply them here. Next I will straighten my edges (they were hand painted, no tapes or tools) and then paint in some sea shells.

Raw Umber Green Dark, Burnt Umber Cyprus Dark

I'd painted this portion of a Luis Melendez painting some time ago. Now I'm retrying it using a method that I am picking up second hand from an artist friend studying in a local atelier. The surface is first coated with Burnt Umber Cypress Dark thinned with OMS. Form is developed by rubbing out with a rag in my hand, a rag over my finger, and a cotton swab. In some cases I have to pick up the brush and reapply pigment. It's really quite thrilling to see an image begin to appear out of the darkness. I wanted to push this further but by 2 AM I was fading and knew this umber would be dry when I woke.

Rub out technique.
Burnt Umber Cyprus Dark

So now I have two pieces in my queue and I'm working on laying out another Melendez copy piece. By the way, I've jumped away from smooth panels--birch plywood, GAC 100, acrylic gesso--and switched to linen. The charts are on linen pads, the paintings on linen panels. Both products are Centurion OP DLX, deluxe oil primed linen. I enjoy the grab of the canvas against my brush and paint. Additionally, the rub out technique needs the linen's texture.

Tuesday, September 18, 2012

My First Still Life

I've been hunkered down with this piece for the past three weeks. I first built a composition with natural light, photographed, and printed out various tonal arrangements to help me set values. With the exception of titanium white and ultramarine blue mixed with burnt umber for the deepest shadow, the oil-based pigments are earths--ochres, umbers and green earth.

After the first week or so I might have stopped. Rather, each evening I'd poke about with new ideas. Curiously, a change in one spot might reverberate calling for updates in other areas. An often felt example was that of making a change on a single clove in that bulb of garlic and how it would disturb the overall form of the bulb. All in all, just a wonderful learning experience.

The surface is very shiny at this point, making it tough to photograph. I took advantage of filtered overcast sky to work around the glare and this photo is reasonably close, albeit with a bit of value and hue shifts.


Friday, August 31, 2012

Thursday, August 30, 2012

Mycelium Musings

Recent rains seem to be the stimuli for hidden mycelium to fruit. All were found within a fifty foot span.


Wednesday, August 29, 2012

Around the lake

I've lately been back to my daily explorations around the lake. The heat of summer is waning, nights becoming cooler. Late summer wildflowers presage the glorious fall colors soon to arrive.

Let me kick off this series of visual posts with my favorite "around the lake" spot.

Reflecting Pool

Starling acrobatics

Joe Pye and Goldenrod

Wednesday, August 8, 2012

Lily Work

The paper support from the previous post just didn't feel satisfying so I brought out one of my new birch plywood panels and transferred the design. I began with a grisaille underpainting and then explored glazing lightly. I was working from a monotone printout posterized down to just four or five values on the lily.

I then mixed strings of yellow into brown--cooler colors for the highlight and halftone; warmer colors for the local color and shadow. I spent a good deal of time standing back up to ten feet or so, working to get the form to read well from a distance.

I'm now going back in, developing detail while holding the overall values in place.


Sunday, July 15, 2012

Yellow Day Lilies

I've been on a quest since the yellow day lilies in my yard began flowering. Nearly every day there has been a photo session for reference material. Once I sat out sketching to become more familiar with details. Then I've been out there taking measurements and notes. Lastly came color studies.

A hand mulled yellow, PY154, proved too warm so an order with Kremer supplied a relatively cool PY184. I also mulled up a tube of PG36 to pull any needed green while keeping the chroma high. From my studies with "Yellow and Blue Don't Make Green" as well as Munsell, these pigments  promised to return nice high chroma.

I created this chart to explore the possibilities. Three days work here, phew.


Next I simply wanted to explore getting paint down. Rather than work on design, I selected one of my many photos, cropped, and printed on the b/w laser. I applied one coat of Golden's GAC 100 to the front side only to seal off any oil absorption and began painting on the paper taped to a panel.


This is proving to be a good path for me as I get to explore tone and color in easy fashion. I can make up these printouts in minutes and they feel like wonderful practice.

Wednesday, July 4, 2012

Panel Making

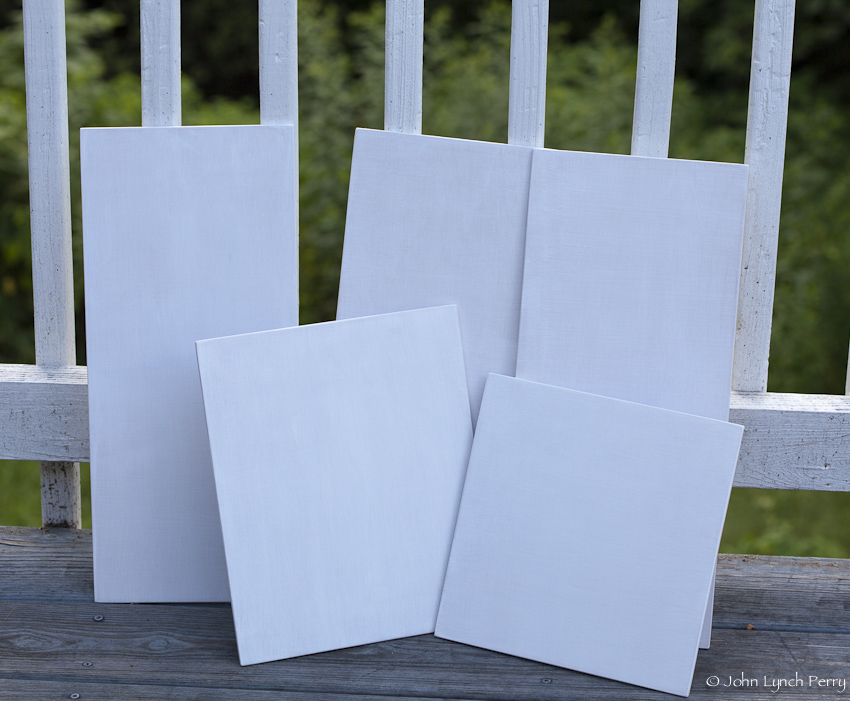
I've been back to panel making, inspired by recent conversations with Golden technical support. The following took place over the past five days.

Birch plywood now replaces hardboard (masonite). I had a sheet of 3/16th's laying around. In the future I will probably increase thickness as there was a bit of warping with a couple of the panels. Ya, some were just fine and I don't know why.

Birch plywood (3/16")
After cutting to size came a bit of sanding with 100, 150 and 200 grit to round off the edges and corners and a light scuffing with 200 grit over the entire panels.

Rounding edge and corner
I opted to use GAC 100 before applying gesso. I like the idea of isolating the raw support from the gesso. Maybe different woods have varying absorptions? I don't know, but perhaps this helps to take some variables out of the picture.

Golden's GAC 100 dries to a tacky touch. Stack panels and they will stick slightly together, coming apart with a clicky grip. There is no sanding to be done with this stuff. Brings the grain out nicely, doesn't it?

Two coats of Golden GAC 100
In the previous post we found that the new sandable gesso does not need base coats of regular gesso. I still have the old stuff here so needed to firstly apply a couple of coats of "regular" gesso. There was no sanding with these coats.

Two coats of Golden Gesso
My workflow is to lay out the panels and walk them to my painting station one by one. Paint a side and put it back. Once done, restart with the other side. It helps to assure me that I equally coat all sides. The gesso products dry to touch so quickly that I can paint nonstop.

Keeping order
Here are the first two coats of sandable gesso. I experimented with various toning media. Acrylics behaved just as nicely as aqueous dispersions. Wish I would have had a tube of deep dark acrylic. It takes a lot of pigment to pull down that gesso. I now think of it as white paint!

I let these first two layers of sandable gesso dry for a day and then sanded with 150 grit to remove most brush marks. The surface was already quite smooth but I just wanted to knock it down a bit. Must one wait a whole day before sanding? Perhaps an hour or so would be adequate. Not sure...

Toned with Golden Acrylic (left) and toned over with aqueous dispersion (right)
Here I tested dry pigments premixed with water using a palette knife. Although the pigment appeared to be well mixed...

Mixing wetted pigment with Golden Sandable Gesso
When I began applying sandable gesso toned with my mixed pigment I was in for a big surprise. The gesso went on very light with dark streaks. Essentially I was mixing my paint on the support! I considered halting work to properly mull the gesso but kept on, eventually applying two coats front and back to all panels.

It will be well worth my time to try mulling pigment (that is, rather than just mixing with palette knife) and mixing with sandable gesso. I use my dry pigments for many purposes already so why not use them here as well? I thought I'd prefer acrylic in a tube but I'm leaning back to my old friends. (I recently inventoried my pigment collection--over 60 of them!)

Streaking pigments
And here's my results! Tomorrow I will give them a light sanding with 150 grit to level them off. I may go to 200 or higher grit with a few as I begin experimenting with first applications of oil paint.

Final coats drying


Thursday, June 28, 2012

Panel Making

For some time I've been experimenting with panel making to support oil paints. I thought I had a good process down but still had a few questions. As I am using Golden products, I turned to their technical support to help me out.

. . .

Here is my query to Golden Technical Support:
I am making panels for oil painting only--no other media. I begin with masonite which I lightly scuff and then apply two coats of GAC 100, then two coats of Acrylic Gesso and finally a few coats of Sandable Acrylic Gesso. My goal is to achieve a smooth surface and I'm pleased with my initial results.

I do have a few questions that I hope you can answer:

-- For oil painting only, should I still first use GAC 100 or can I start right off with Acrylic Gesso?

-- If I should use GAC 100, would GAC 500 work just as well. (I am interested in the self-leveling property.)

-- Do I need to use Acrylic Gesso before applying Sandable Acrylic Gesso? I seem to remember reading that in one of Golden's guidelines for use but cannot now locate it. From what I can find I do not need to use regular gesso before applying sandable gesso.

-- Can I tone Sandable Acrylic Gesso with dry pigments? I have toned the Sandable Acrylic Gesso with a raw umber aquaeous dispersion from Natural Pigments and that seemed to work well. I later read that Golden recommends toning with acrylic paint. I'd like to be able to use my collection of dry pigments if that is possible.
. . .

And here is Golden's reply:
We are not fans of hardboards, generally speaking. 'Hardboard' is the general term for what used to be called masonite, which was a brand of hardboard, not produced anymore, to my knowledge. Hardboards are made with wood dust and a variety of ways of getting them to stick together. Some use resins, some use polymerized oils, etc. The main issue has to do with moisture sensitivity. We think that either Birch Plywood or MDO Plywood are better choices, and that either of those panels would have better dimensional stability. Having said that, many artists are still using hardboards of various sorts. It is possible that certain types are more stable than others, but we do not have that information.

You do not need to be concerned with SID or support induced discoloration if you are painting with oils, so the GAC 100 or another stain blocking primer is not required for that reason. The other reason for using GAC 100 is to block oil absorption into canvas, but I doubt this is a concern with the hardboard. We still like the idea of some kind of separation or primer, and you could use a commercially available one such as Kilz, in either the alkyd or water borne variety, or you could use GAC 100. The newly re-formulated SHG does not require a coat of Gesso first, so you can apply it directly over the GAC 100 ( or 500 if you like, in this instance ), or commercial stain blocking primer.

Yes, assuming you can get the dry pigments to disperse well, you can use small amounts to tint the SHG. Too much may make the mixture have a higher propensity to crack or craze upon drying. The reason we recommend acrylic paints is because dry pigments tend to clump and it is difficult to get then dispersed and homogenized in the material, without using a paint mill or special mixing machine. But, if you feel it is working for you, then by all means go ahead.

Our Sandable Hard Gesso tech sheet is found when you put your cursor over 'Products", then click on 'Gessos and Grounds'. Here it is:

http://www.goldenpaints.com/technicaldata/sandable.php

I hope this information is helpful, and if you have more questions, please don't hesitate to call or email.
. . .

My follow-up responses:
I finally found the reference to first applying regular gesso before sandable--right on the label. So for now I'll stay with my process until I pick up a new jar of sandable gesso.

I hear you on the dry pigments. I suppose I could try to premix pigment with gesso using a palette knife or muller on my grinding glass but I'd be going against the quick drying nature of the gesso. All this instead of a little squeeze of acrylic paint...
. . .

I'll be documenting my adjusted panel making in a later post. I have plywood to cut and a proper color of acrylic paint to select. I've learned that even with an established process, it must be revisited to keep up with product changes.

Thursday, June 21, 2012

A little more work

Some time ago I wanted to compare the relative yellowness of various oils. Additionally, I duplicated the comparison so as to keep one in sunlight, the other darkened. While building these samples I really didn't pay attention to the thickness of applied oils, making my test a bit skewed. But, the difference between light and dark is more significant than I would have imagined.


After a good start over a week ago, I'd slipped away from my brushes. At this point I'm simply blocking in with minimal form and detail.